Writing a Home Assistant Core Integration: Part 2
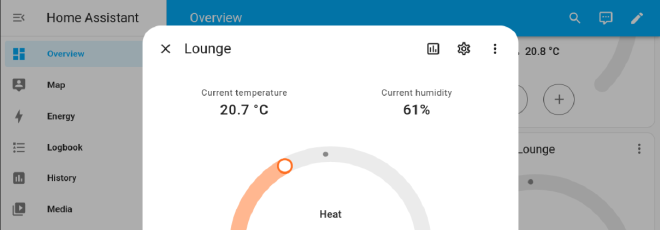
Table of Contents
Introduction #
In my last post I described the first steps toward creating a new Home Assistant integration for the underfloor heating system in my house. In that post I outlined in detail how I set about creating a Python client for the API provided by the underfloor heating controller vendor.
In this post, I’ll describe the development setup, project structure and contribution process for building and landing a Home Assistant Core integration. I don’t consider myself an expert here, but I’ve documented my journey here in the hope that my experience might be useful to potential future contributors.
The finished integration can be seen in the Home Assistant docs under the name touchline_sl, and the code can be found on Github.
Development Setup #
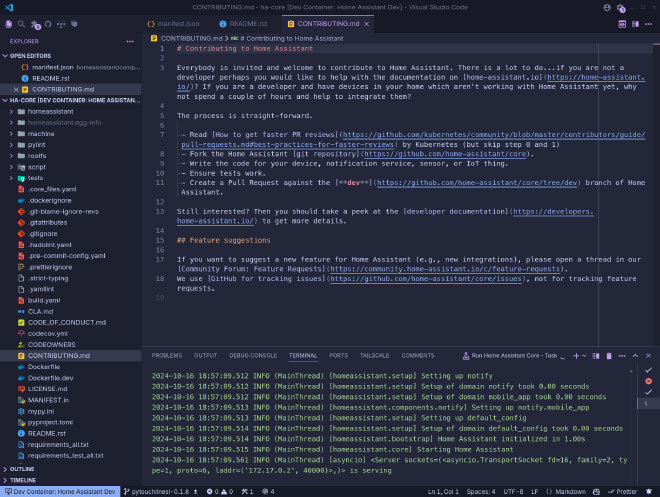
The Home Assistant documentation recommends the use of Visual Studio Code with a devcontainer. This was a very quick way to get a working environment up and running, especially given that I already use Visual Studio Code for most of my programming, so I was immediately familiar.
The repository provides some tasks to help get started, including a task named Run Home Assistant Core, which takes care of setting up the runtime environment, installing dependencies and starting the server. Neat!
There are also a set of pre-commit hooks set up to ensure you don’t make any common mistakes, accidentally violate the formatting/static-typing rules for the project, forget to update requirements.txt files, etc.
This turned out to be a really nice way to get started, and if you’re new to Home Assistant Core development, I’d recommend giving this “batteries-included” approach a go. If it’s not for you, the project provides manual setup instructions too.
Integration Basics #
According to the documentation:
[An] integration is responsible for a specific domain within Home Assistant. Integrations can listen for or trigger events, offer actions, and maintain states.
Where a domain is…
a short name consisting of characters and underscores. This domain has to be unique and cannot be changed.
Err, right… while this is an accurate statement, it’s perhaps not the most enlightening for the budding new integration developer! At their core, integrations are Python modules that take information about a given system (like an underfloor heating system, or a smart plug, or a light bulb) and represent information about them in a format compatible with one of Home Assistant’s archetypes for devices/sensors/platforms/entities.
In this case, we’ll be representing Climate Entities, which have the sort of properties you might expect - target_temperature, current_humidity, current_temperature, etc.
To use Home Assistant’s terms, in my setup:
- The platform is the underfloor heating system
- The platform consists of some devices, in this case the physical thermostats in each room of my house
- The devices each represent one or more climate entities (humidity, temperature, etc.)
File Structure #
The basic file structure can be laid down with some scaffold tooling, but even in its finished state, my integration doesn’t have many files:
| |
And to give an idea of the scale of the project in its completed form:
----------------------------------------------------------------------
Language            files          blank        comment           code
----------------------------------------------------------------------
Python                  5             71             27            215
JSON                    3              0              0             82
----------------------------------------------------------------------
SUM:                    8             71             27            297
----------------------------------------------------------------------
manifest.json #
Starting with the most simple first! The manifest.json describes the integration: what its name is, where its documentation is found, who owns the code and the libraries it depends on:
| |
Here I selected cloud_polling as the iot_class, because my integration reaches out periodically to the API, polling for new information. You’ll note also that the integration requires my pytouchlinesl library in order to run.
__init__.py #
Typically for integrations, this file defines how to setup the integration, and how to unload it. You can see the full source of my implementation on Github.
I define an async_setup_entry() method which takes care of:
- Establishing a coordinator per TouchlineSL module
- Performing the initial hydration of data
- Registering each TouchlineSL module as a device in Home Assistant’s Device Registry, which is where Home Assistant “keeps track of devices”
There is a shortened, annotated version of the method below:
| |
Before returning async_setup_entry() invokes async_forward_entry_setups(). This ensures that async_setup_entry() in climate.py is called to ensure each of the climate entities is registered.
The PLATFORMS variable is a list of platform types that the integration supports, in this case a single-item list containing just Platform.CLIMATE, which is how async_forward_entry_setups knows to invoke the async_setup_entry() method in climate.py:
| |
To initialise the integration, the user must authenticate with the Roth API so that module details are fetched before constructing the coordinator. Thus, before this code is executed, the user must go through the config flow…
config_flow.py #
Despite the final implementation being quite simple, this is probably one of the areas I found most challenging to get right. There are some docs but they only scratch the surface, and implementations in other integrations seem to vary quite dramatically (mostly depending on when they were written).
I went through a few iterations of this config flow, mostly because I had originally implemented the ability to select a specific module from the user’s account. The review process guided me toward simply logging into the account, then enrolling each of the modules associated with the account - since users can always disable entities they don’t wish to manage in Home Assistant.
The config_flow.py defines which input fields need to be presented to the user, and then passes on the relevant information needed to set up the integration. In my implementation, the code:
- Prompts the user for their username and password
- Authenticates with the service and fetches the user’s unique ID
- Registers that unique ID, aborting if the specified account has already been used
- Creates a config entry in Home Assistant that stores the user’s credentials
The config flow also has some basic error handling that can distinguish the difference between poor credentials, networking issues, etc. The full implementation can be seen on Github, but the important parts are highlighted in the following snippet:
| |
What caught me out was how the fields are given titles/descriptions. These attributes are all configured in the strings.json, where the config map contains keys for each of the config “steps”.
The code above defines a step named user, since the method name is async_step_user. The step’s name, description and input fields are defined in the strings.json:
| |
The values displayed to the user are pulled from the translation files at runtime depending on their language configuration. In my integration, the corresponding translations/en.json contains the following fields that map to those defined above:
| |
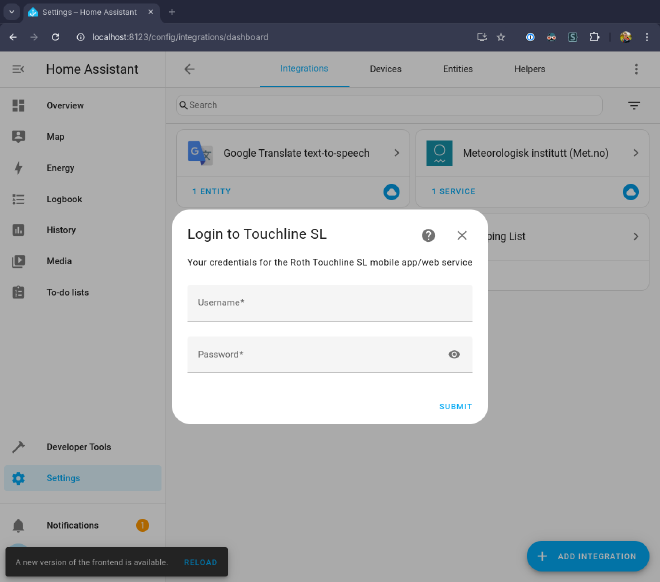
In hindsight, this is covered in the docs, but it definitely didn’t click with me when I was going through it, so it seemed worth calling out! The net result of this setup is a configuration dialog that looks like so:
coordinator.py #
This was an addition I made during the review process (more on that later), and appears to be the preferred way to implement the fetching of data from upstream APIs. By implementing a DataUpdateCoordinator, Home Assistant can ensure that a single coordinated poll happens across all entities managed by an integration. If an integration manages many entities for which it needs to fetch/update details, the coordinator helps ensure that the API is called only as often as is needed.
The coordinator class is very simple: it defines a single method _async_update_data which returns the data for the device its coordinating. As the developer, you can specify the type of the data returned by the coordinator. I chose to represent this as a Python dataclass:
| |
The coordinator is initialised with some basic information such as a name and an update interval:
| |
The _async_update_data method then queries the API, and returns data in the newly defined format:
| |
You can see the full implementation on Github.
climate.py #
And finally, on to the business logic of tying fields from the upstream API into the relevant attributes in Home Assistant!
The first task handled by this file is registering each of the climate entities by iterating over each zone, in each coordinator’s module:
| |
Home Assistant entities have well-defined APIs - the docs for climate entities show the supported attributes and their data types. I used a combination of the docs, and the source code to establish how to implement my ClimateEntity, which boiled down to the following interface:
| |
Arguably the most important part here is set_attr(). which takes care of mapping fields from the objects provided by my pytouchlinesl library to attributes on the climate entity:
| |
The full implementation is on Github.
Testing #
Testing is (understandably) a little complicated. The requirements for landing code for an integration stipulate that you must include unit tests for any config/options flows. In my case, this meant the following:
- Implementing a mock TouchlineSL client fixture to ensure that the unit tests don’t try to reach out to the real Roth API
- Implementing a mock config entry fixture
- A unit test for a successful config flow execution
- A parametrised unit test for unsuccessful config flow due to possible exceptions when hitting the API
- A unit test to ensure that multiple config flows resulting in the same user ID fail
To me this feels like the bare minimum, and unfortunately doesn’t really provide any confidence that the integration actually functions correctly. I’m hoping to improve this in the future, but for now further testing has been manual.
Docs & Brand #
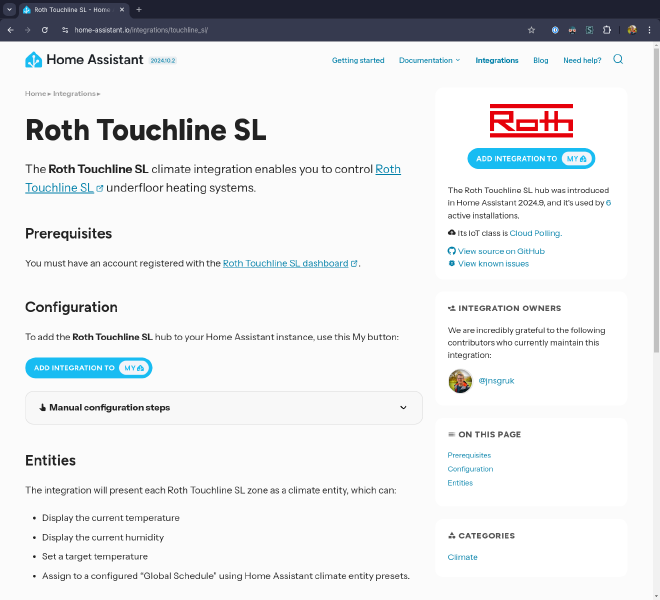
As I was creating the Pull Request to contribute my integration, I was prompted by the template to link to further PRs that added the documentation and brand assets for my integration. I used the existing touchline docs as a template and modified them for my integration. The docs pull request added a single file touchline_sl.markdown containing 29 lines, which results in some nicely rendered docs on the Home Assistant website:
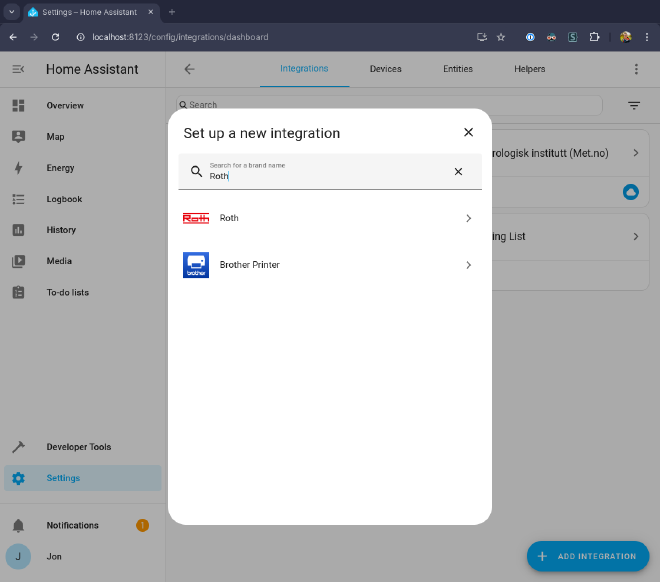
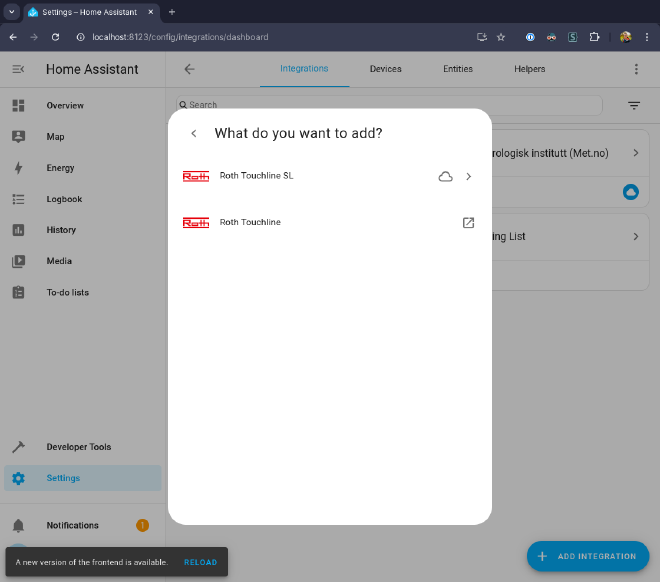
There were already branding assets for Roth as part of the touchlinesl integration that was previously merged. Based on some review feedback, I created a new Integration Brand named roth, with which both the touchline and touchline_sl integrations are associated. This has the nice effect of grouping them when setting up a new integration:
Contribution Process #
I submitted my first efforts for review in home-assistant/core#124557. The checklist guided me nicely through what needed to be done, and overall the process went pretty smoothly, and pretty quickly (despite the 117 comments!). The process took a little under two days in total. I was also fortunate with my timing, since my code landed the day before the next beta release was cut, so it shipped relatively quickly.
I’d like to offer my sincere thanks to @joostlek who not only reviewed my code extremely quickly, but took the time to explain things to me both in the Github PR, but also by proactively reaching out to me on the Home Assistant Discord, which I really appreciated.
I got a lot of feedback, which I expected. This was my first attempt at writing code for Home Assistant, and it’s a pretty large and well established project. I do think the project could do with some better developer documentation, which would dramatically reduce the burden of effort on reviewers and give contributors a better chance of “getting it right”.
One might argue I could have done more reading and more research - though I spent a good amount of time reading both the documentation and the source code of other integrations. I’m not sure I’d ever have reached the conclusions that @joostlek kindly nudged me toward.
Overall, my implementation was more brief, more simple and more efficient as a result of the review process, and based on my experience I’d advocate for having a go if you’ve been on the fence! Often submitting code to such a project can be daunting, but as with my experience when contributing to nixpkgs, if you go in with an open mind you’re sure to learn something from the process.
Results #
I’m really pleased with the results. However obtuse the developer experience felt at times, there is no denying that what I was able to get from my 297 lines of implementation code is quite staggering. I was super impressed that just by following the conventions I was able to get such intuitive controls, a full graphable history of temperatures and such a wide variety of ways to display the information in my various dashboards.
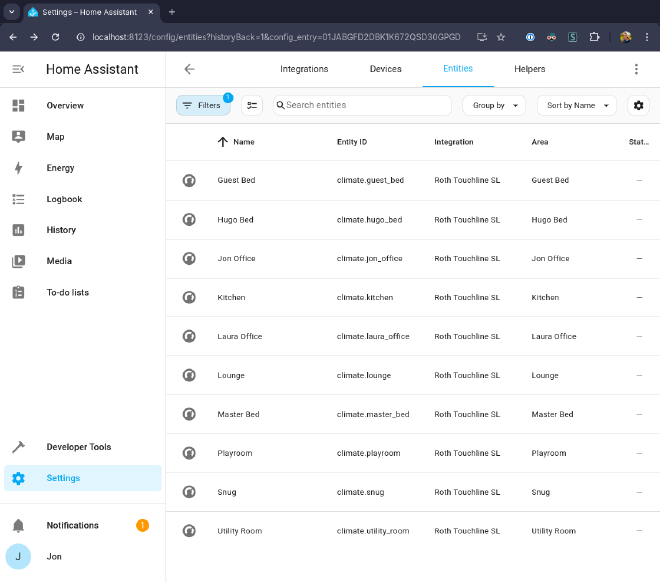
Once set up, you’re able to get a view of all the different zones imported by the module (the names of each zone are pulled from the upstream API if the zones are named, and each can be associated with a given area in Home Assistant):
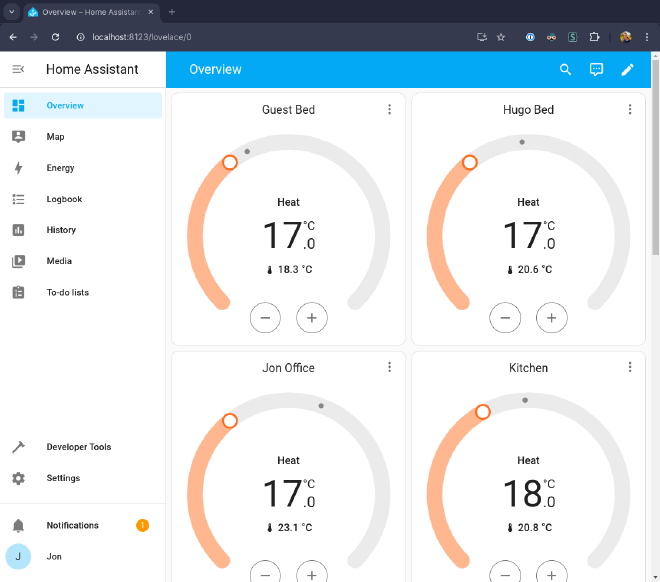
The default dashboard displays thermostat controls for each zone. These allow you to see the current and target temprature, as well as adjust the target temperature if you need to:
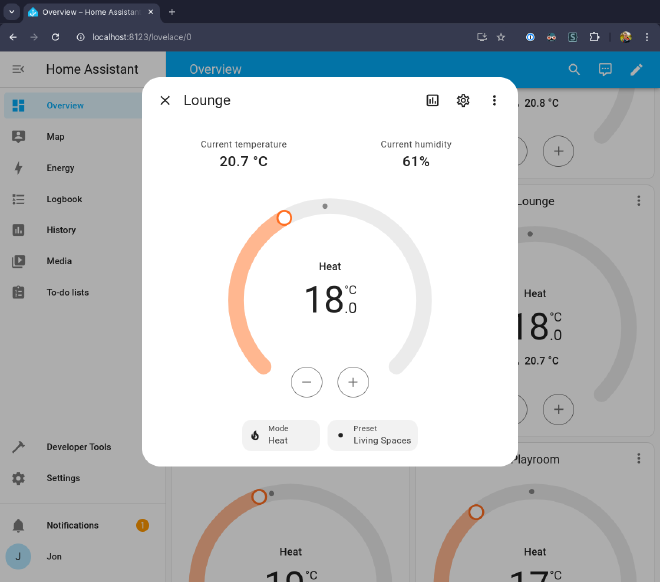
Expanding the thermostat cards gives you a more detailed view, showing the mode and the “Preset”. My implementation maps “Presets” to “Global Schedules” configured in the Roth module:
Summary #
And that’s a wrap! I learned a bunch writing this integration, and the resulting user experience is quite a lot better than I get with the default Roth application.
My next mission is to use the information from these climate entities to automate opening the Velux windows in the roof when things get warm in the summer, but I’ve got a lot to learn about Home Assistant in the mean time!
