Workstation VMs with LXD & Multipass
Table of Contents
Introduction #
Over the years, I’ve used countless tools for creating virtual machines - often just for short periods of time when testing new software, trying out a new desktop environment, or creating a more isolated development environment. I’ve gone from just using the venerable qemu at the command line, to full-blown desktop applications like Virtualbox, to using virt-manager with libvirt.
When I joined Canonical back in March 2021, I’d hardly used LXD, and I hadn’t ever used Multipass. Since then, they’ve both become indispensable parts of my workflow, so I thought I’d share why I like them, and how I use each of them in my day to day work.
I work for Canonical, and am therefore invested in the success of their products, but at the time of writing I’m not responsible for either LXD or Multipass, and this post represents my honest opinions as a user of the products, and nothing more.
Installation / Distribution #
Both LXD and Multipass are available as snap packages, and that’s the most supported and recommended route for installation. LXD is available in the repos of a few other Linux distributions (including NixOS, Arch Linux), but the snap package also works great on Arch, Fedora, etc. I personally ran Multipass and LXD as snaps on Arch Linux for a couple of years without issue.
If you’d like to follow along with the commands in this post, you can get setup like so:
| |
Early on in my journey with NixOS, I packaged Multipass for Nix. I still maintain (and use!) the NixOS module. This was my first ever contribution to NixOS – a fairly colourful review process to say the least…
The result is that you can use something like the following in your configuration, and have multipass be available to you after a nixos-rebuild switch:
| |
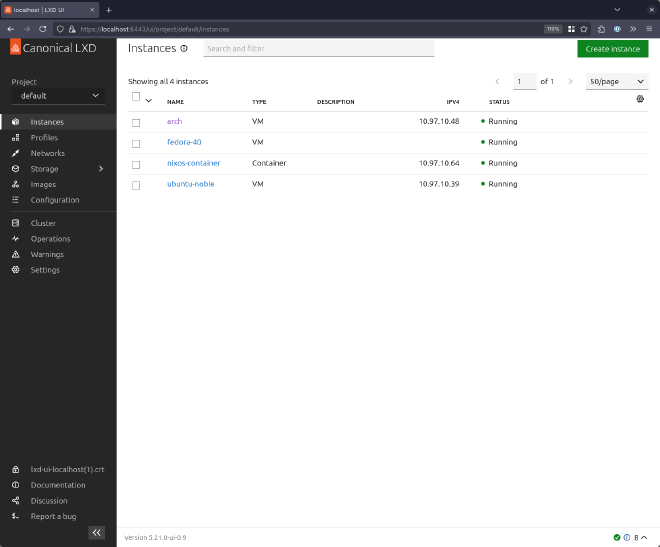
LXD has been maintained in NixOS for many years now - and around this time last year I added support for the LXD UI. The screenshots you see throughout this post are all from LXD UI running on a NixOS machine using the following configuration:
| |
Ubuntu on-demand with Multipass #
Multipass is designed to provide simple on-demand access to Ubuntu VMs from any workstation - whether that workstation is running Linux, macOS or Windows. It is designed to replicate, in a lightweight way, the experience of provisioning a simple Ubuntu VM on a cloud.
Multipass makes use of whichever the most appropriate hypervisor is on a given platform. On Linux, it can use QEMU, LXD or libvirt as backends, on Windows it can use Hyper-V or Virtualbox, and on macOS it can use QEMU or Virtualbox. Multipass refers to these backends as drivers.
Multipass’ scope is relatively limited, but in my opinion that’s what makes it so delightful to use. Once installed, the basic operation of Multipass couldn’t be simpler:
| |
This one command will take care of creating the primary instance if it doesn’t already exist, start the instance and drop you into a bash shell - normally in under a minute.
Multipass has a neat trick: it bundles a reverse SSHFS server that enables easy mounting of the host’s home directory into the VM. This happens by default for the primary instance. As a result the instance I created above has my home directory mounted at /home/ubuntu/Home - making it trivial to jump between editing code/files on my host and in the VM. I find this really useful - I can edit files on my workstation in my own editor, using my Yubikey to sign and push commits without having to worry about complicated provisioning or passthrough to the VM, and any files resulting from a build process on my workstation are instantly available in the VM for testing.
Multipass instances can be customised a little. You won’t find complicated features like PCI-passthrough, but basic parameters can be tweaked. The commands I usually run for setting up a development machine when I’m working on Juju/Charms are:
| |
Once you’re done with an instance, you can remove it like so:
| |
Multipass does have some more interesting features, though most of my usage is represented above. One feature that might be of more interest for MacOS or Windows users is aliases. This feature enables you to alias local commands to their counterparts in a Multipass VM, meaning for example that every time you run docker on your Mac, the command is actually executed inside the Multipass VM:
| |
Multipass will launch the latest Ubuntu LTS by default, but there are a number of other images available - including some “appliance” images for applications like Nextcloud, Mosquitto, etc.
There is also the concept of Blueprints which are essentially recipes for virtual machines with a given purpose. These are curated partly by the Multipass team, and partly by the community. A blueprint enables the author to specify cores, memory, disk, cloud-init data, aliases, health checks and more. The recipes themselves are maintained on Github, and you can see the list of available images/blueprints using multipass find:
| |
The team also recently introduced the ability to snapshot virtual machines, though I must confess I’ve not tried it out in anger yet.
LXD… for VMs? #
For many people, LXD is a container manager - and indeed for many years it could “only” manage containers. LXD was built for running “system containers”, as opposed to “application containers” like Docker/Podman (or Kubernetes). Running a container with LXD is more similar to to running a container with systemd-nspawn, but with the added bonus that it can cluster across machines, authenticate against different identity backends, and manage more sophisticated storage.
Because LXD manages system containers, each container gets its own systemd, and behaves more like a ’lightweight VM’ sharing the host’s kernel. This turns out to be a very interesting property for people who want to get some of the benefits of containerisation (i.e. higher workload density, easier snapshotting, migration, etc.) with more legacy applications that might struggle to run effectively in application containers.
But this post is about virtual machines. Since the 4.0 LTS release, LXD has also supported running VMs with qemu. The API for launching a container is identical to launching a virtual machine. Better still, Canonical provides images for lots of different Linux distributions, and even desktop variants of some images - meaning you can quickly get up and running with a wide range of distributions, for example:
| |
You can get a full list of virtual machine images like so:
| |
LXD Desktop VMs #
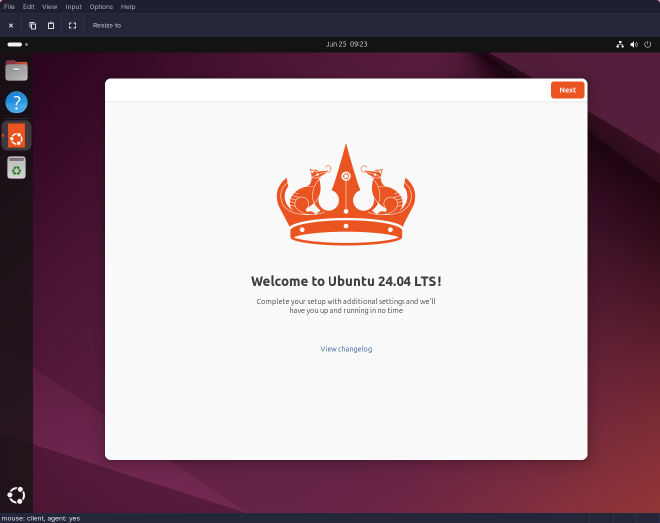
Another neat trick for LXD is desktop virtual machines. These are launched with curated images that drop you into a minimal desktop environment that’s configured to automatically login. This has to be one of my favourite features of LXD!
| |
The guest is pre-configured to work correctly with SPICE, so that means clipboard integration, automatic resizing with the viewer window, USB redirection, etc. The same also works for other distros, as before:
| |
LXD UI 😍 #
Back in June 2023, Canonical announced early access to the LXD graphical user interface on their blog. The LXD UI is now generally available and enabled by default from LXD 5.21 onwards - though you can find instructions for enabling it on earlier versions in the docs. The summary is:
| |
In my opinion, the LXD UI is one of the best, if not the best way to interact with a hypervisor yet. Being a full-stack web application, it gains independence from different GUI toolkits on Linux and, provided the cluster is remote, can be accessed the same way from Windows, Mac and Linux.
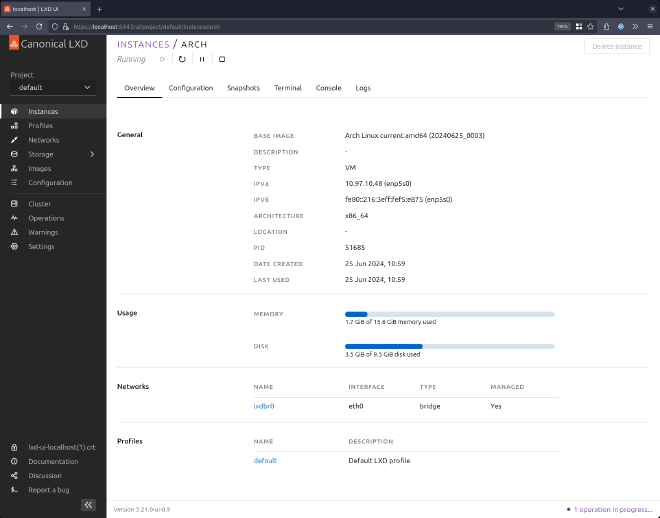
I’ve used other hypervisors with web UIs, particularly Proxmox, and I’ve found the experience with LXD UI to be very smooth, even from the early days. The UI can walk you through the creation and management of VMs, containers, storage and networking. The UI can also give you a nice concise summary of each instance (below is the summary of the VM created using the command in the last section):
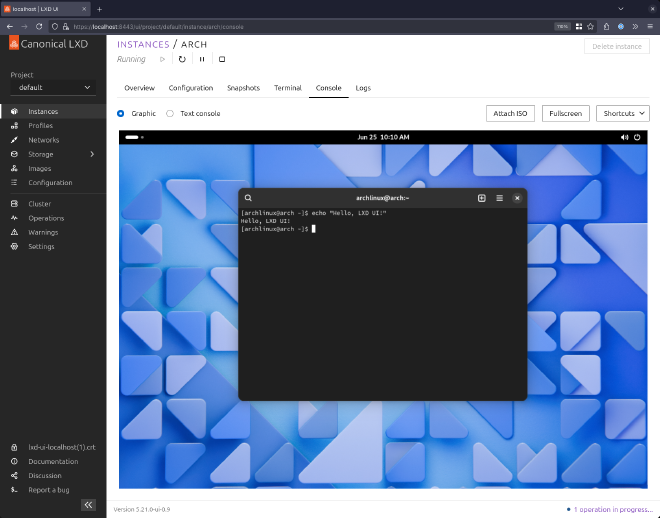
One of my favourite features is the web-based SPICE console for desktop VMs, which combined with the management features makes it trivial to stand up a desktop VM and start testing:
Why both? #
By now you’ve probably realised that LXD can do everything Multipass can do, and give much more flexibility - and that’s true. LXD is a full-featured hypervisor which supports much more sophisticated networking, PCI-passthrough, clustering, integration with enterprise identity providers, observability through Prometheus metrics and Loki log-forwarding, etc.
Multipass is small, lean and very easy to configure. If I just want a quick command-line only Ubuntu VM to play with, I still find multipass shell to be most convenient - especially with the automatic home directory mounting.
When I want to work with desktop VMs, interact with non-Ubuntu distributions, or work more closely with hardware, then I use LXD. I was already a bit of a closet LXD fan, having previously described it as a bit of a “secret weapon” for Canonical, but since the introduction of the LXD UI, I’m a fully paid up member of the LXD fan club 😉
Summary #
As I mentioned in the opening paragraphs - both LXD and Multipass have become central to a lot of my technical workflows. The reason I packaged Multipass for NixOS, was that I wanted to dive into daily-driving NixOS, but not without Multipass! In my opinion, the LXD UI is one of the most polished experiences for managing containers and VMs on Linux, and I’m really excited for what that team cooks up next.


